A live backup of a Raspberry Pi refers to making a copy of the entire system while it is still running and all of its files are in use. This can be useful because it allows you to capture the exact state of the system at the time the backup was taken, including any changes or updates that were made since the last backup.
In addition, during a live backup, the system remains available for use. Processes can continue to run, and there is no service interruption.
This can be especially important if the system is providing critical services that cannot be interrupted for a long period of time, to name a few, a web server or, in a home environment, a home automation system such as Home Assistant.
In this guide, we are going to use a set of scripts developed by a Raspberry Pi Forum user named RonR. Image File Utilities is absolutely great software that provides the following features, as stated in the forum post:
-
takes a full or incremental backup of the whole Raspberry Pi while the system is running, creating a standard RAW image file that can be written to an SD card or USB drive using standard tools, such as Raspberry Pi Imager
-
since the utility is based on rsync, it is possible to specify rsync parameters, for example --exclude-from
-
the backup .img file can be mounted and browsed to inspect the content and restore even a single file by just copying it
-
this package is comprised of other interesting utilities, which I will cover later on in this guide
Preparing the USB storage device
The use case explained in this guide is a Raspberry Pi full backup on a USB drive, scheduled once a day. In my system, I used a SanDisk tiny USB drive, which worked well and fits perfectly in the Raspberry Pi's USB port without taking up too much space.

All USB drives come formatted with the NTFS filesystem, but for use on a Linux system, they need to be reformatted with the EXT4 filesystem. How to do that is out of the scope of this guide, but there are plenty of examples you can find using Google. My preferred method to change any drive partitioning or formatting is using gparted. I also like to give them a name related to their role in the system. In this case, I named my drive bckp01.
Once you have formatted you USB drive with the EXT4 file system, plug it into the Raspberry Pi USB port. If this is the only USB storage device connected to the system, it will probably show up as /dev/sda1 You can check it by this command:
ls /dev/sda*
Double check that your drive is properly detected by the Raspberry Pi and the file system is actually EXT4:
sudo blkid /dev/sda1

Prepare a mount point where the USB drive will be mounted:
sudo mkdir /mnt/usbbckp
In order to have your USB drive mounted at boot, you need to edit the fstab file to include the new device
sudo nano /etc/fstab
Using the Nano editor, append this statement at the bottom of the file:
/dev/sda1 /mnt/usbbckp ext4 defaults 0 0
Reboot the Raspberry Pi
sudo reboot
Verify that the USB drive was mounted during the boot process:
df -h

Creating the backup job
To automate the backup of my system, I prepared a simple script that is executed by the cron scheduler once a day, preferably during the night,
when there are few chances that someone is logged on.
In addition to making the backup, the script deletes all files older than 3 days, so that the USB drive is never filled up.
Create the backup script with the Nano editor:
sudo nano /usr/local/bin/dailybackup.sh
Paste this code and save:
#!/bin/bash

# Deleting files older than 3 days
/usr/bin/find /mnt/usbbckp -mindepth 1 -mtime +3 -type f -delete

# Deriving backup filename based on current date
fn="/mnt/usbbckp/backup$(date +%Y%m%d).img"

# Performing RonR image backup
/usr/local/bin/image-backup -i $fn
Give the script execution permission:
sudo chmod +x /usr/local/bin/dailybackup.sh
Download the image-backup script from GitHub
sudo wget https://raw.githubusercontent.com/CSRLabs/RonR-RPi-image-utils/master/image-backup -P /usr/local/bin/
Give the script execution permission:
sudo chmod +x /usr/local/bin/image-backup
Before creating the actual cron job, you might want to manually test that everything is working as expected. Try to launch a full backup:
sudo /usr/local/bin/dailybackup.sh
Please be patient, because the backup process is going to take a few minutes to complete.
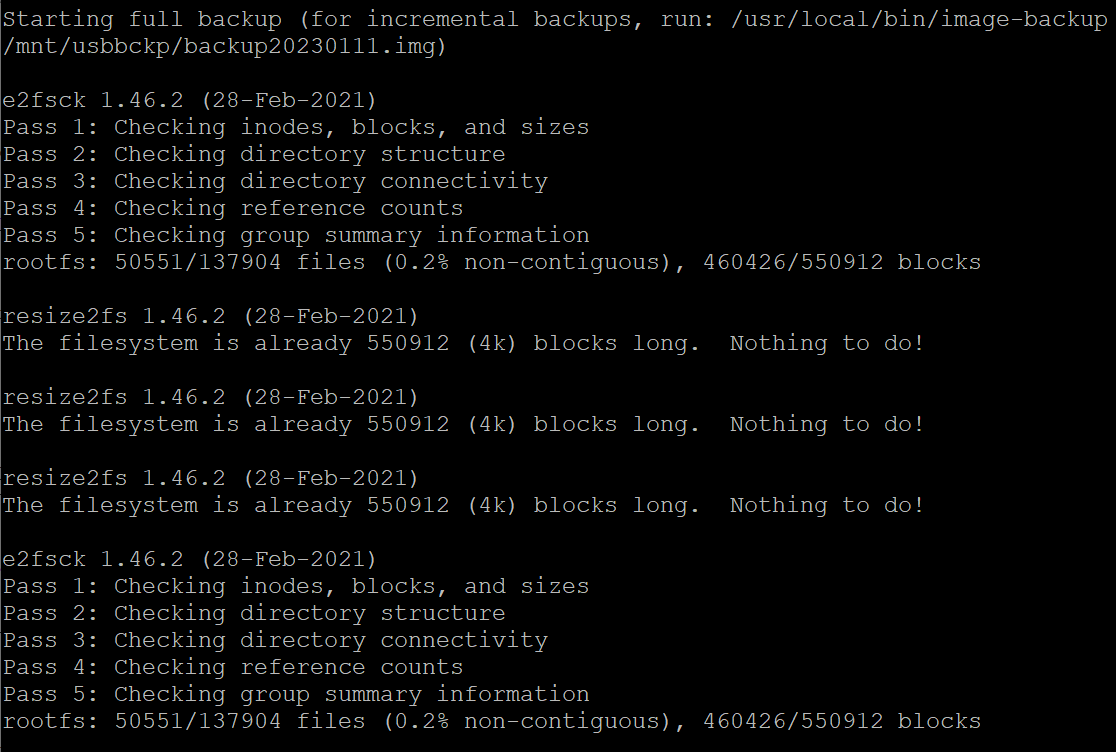
You will see an output similar to this:

Verify that the image file has been created. In my case the file size was around 3GB.
ls -l /mnt/usbbckp
Schedule the backup with cron
Now you are good to go with creating a cron job to schedule your backup during the night:
sudo crontab -e
You will be asked which editor to use, choose Nano. Paste this statement at the bottom:
15 1 * * * /usr/local/bin/dailybackup.sh
You can change the timing according to your needs.
Other Image File Utilities
As I said earlier in this guide, the Image File Utilities package provides other interesting tools. You can get the whole package in my GitHub repository.
Image-mount is, in my opinion, one of the most useful tools. It can mount a backup image so that you can browse files and easily copy them back to your system.
If you want to try it, you need to download the image-mount file from GitHub, copy it to the /usr/local/bin directory and give it execution permission.
Then create an additional mount point:
sudo mkdir /mnt/imgbckp
Now you can try to mount the backup image that you manually created earlier in this guide:
sudo image-mount /mnt/usbbckp/backup20230111.img /mnt/imgbckp Linux
This will mount the ROOT partition of your Raspberry Pi system. If you want to mount the BOOT partition, use the W95 parameter instead of Linux.
Please notice that your backup filename is going to be different from the one above, as you will perform the actual backup on a different day.
Adjust the command accordingly.
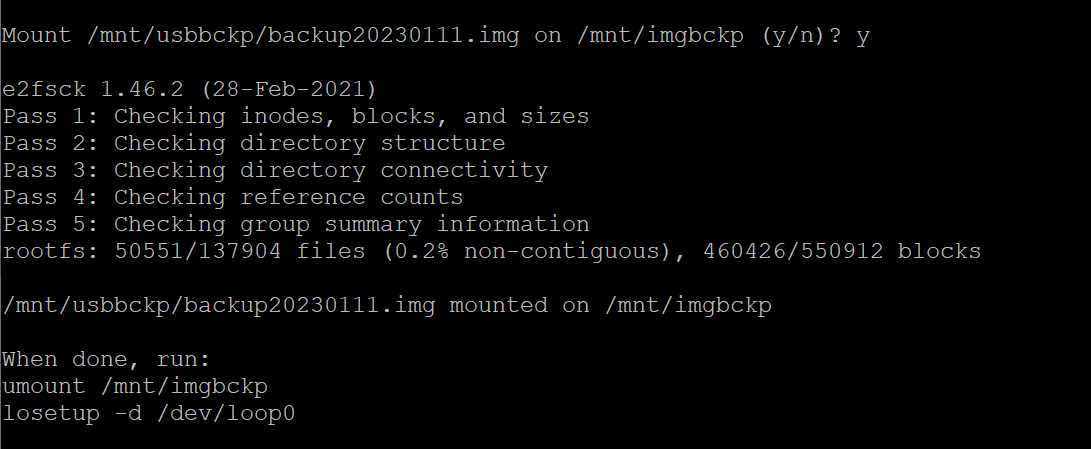
You will get an output similar to this:

Now you can go to the mountpoint and inspect the content of your backup by just browsing files!
cd /mnt/imgbckp
ls -l
To properly unmount your backup image, follow the suggested commands in the output above:
sudo umount /mnt/imgbckp
sudo losetup -d /dev/loop0


