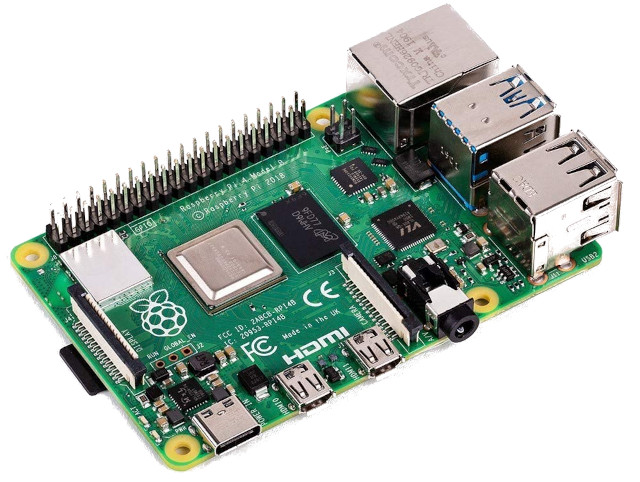
The Raspberry Pi is a small and affordable computer that was initially designed as an educational tool for teaching computer science and programming to students. However, due to its versatility and low cost, the Raspberry Pi has also gained popularity as a reliable industrial device.
One of the reasons why the Raspberry Pi is suitable for industrial use is its stability. Despite its small size and low cost, the Raspberry Pi is a reliable and durable device that is capable of running a wide range of applications, including use as a server.
Additionally, the Raspberry Pi has a large and active community of users and developers who are constantly working on new projects and creating resources to help others get the most out of their devices. This community support means that there is always a wealth of knowledge and resources available to help users troubleshoot any issues they may encounter.
These are the main goals for optimizing the Raspberry Pi for server use:
- Choose the right storage device (SD card)
- Install the Raspberry Pi OS Lite - no desktop interface as the server will run headless
- Disable DHCP - a server must have a fixed IP address
- Disable Wi-Fi and Bluetooth - a server must have a wired network (Wi-Fi may also disrupt home automation radio protocols such as ZigBee)
- Configure hosts file as a fallback name resolution in case DNS becomes unavailable.
Choose the right storage device (SD card)
Selecting the right SD card for the Raspberry Pi is important for performance and reliability, the latter being the most important characteristic,
especially when the server needs to perform a high rate of writes to the storage.
I found the SanDisk Endurance cards good for reliability and durability, but other brand cards exist with comparable specs.

Install the Raspberry Pi OS Lite
These are the steps to properly install the Raspberry Pi OS Lite, using the official SD burner tool.
Download the latest version of Raspberry Pi OS Lite 64-bit from the official Raspberry Pi web site.
Download and install Raspberry Pi Imager from the official Raspberry Pi website. In this tutorial, I will show screenshots taken from Windows 10, but the Raspberry Pi Imager is available for all major operating systems.
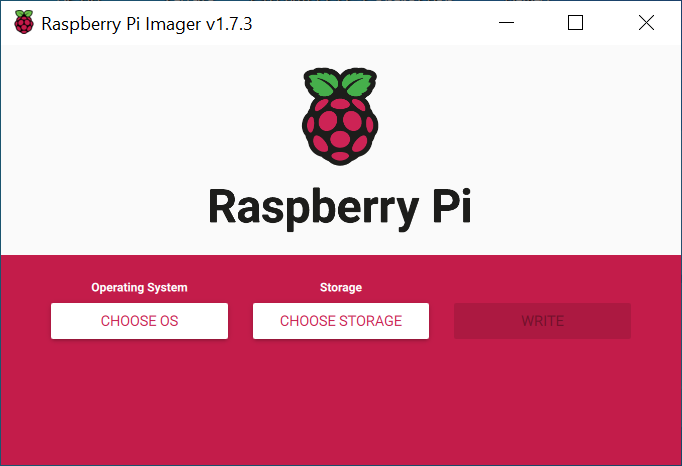
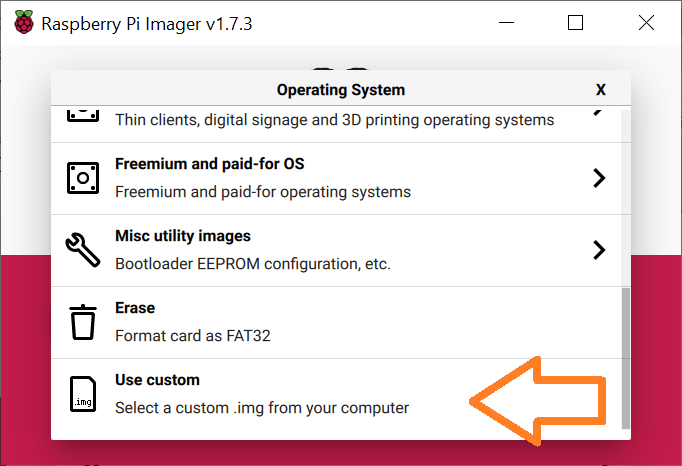
Launch the Raspberry Pi Imager tool, click on "CHOOSE OS" button and select "Use Custom" from the list.
You will get a "file open" screen according to your computer OS, and you will need to select the Raspberry Pi OS Lite image file that you downloaded in the previous step.
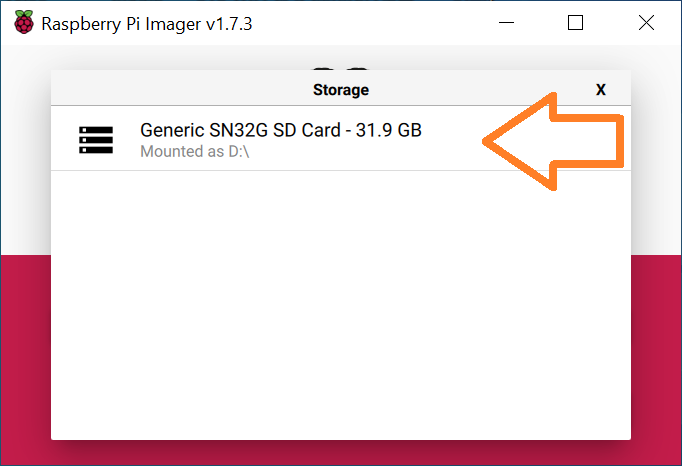
Insert your SD card in the reader and then click on "CHOOSE STORAGE" button and select the SD card you have just inserted.
Now we need to customize the OS installation by choosing some parameters before the actual OS image gets burned to the SD card. Click on the gear icon.
![]()
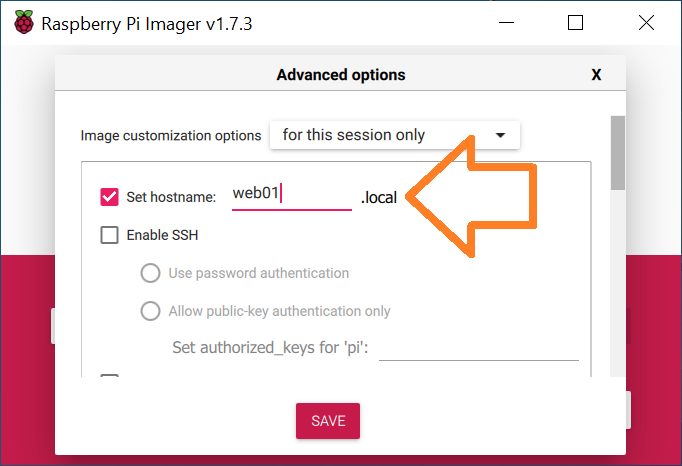
Select a hostname for your server; in this tutorial, I used web01 because I was building a web server, but you can choose whatever name you want.
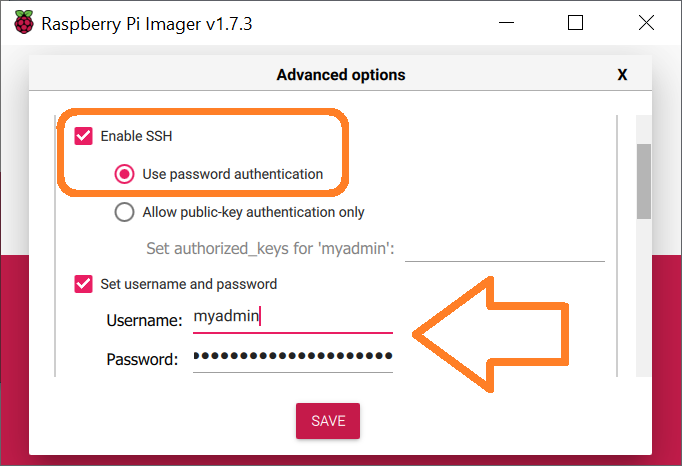
Scroll down and check "Enable SSH" with "Use password authentication" then select a username and password for your user.
Notice that, for security reasons, it is no longer possible to choose "pi" as a username.
Click "SAVE"
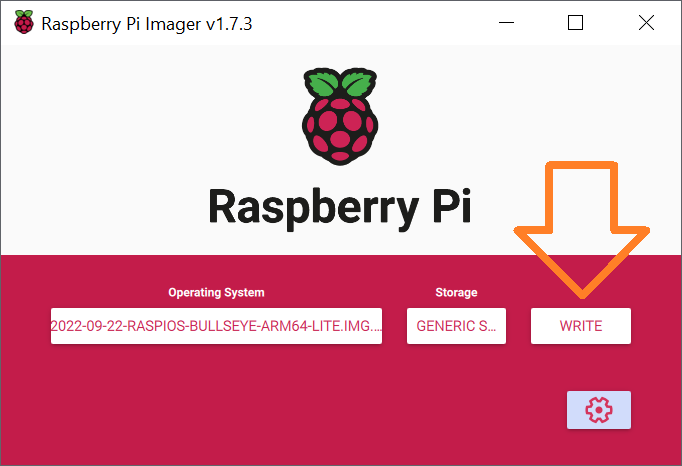
Now we are ready to actually burn the OS image to the SD card.
Click the "WRITE" button.
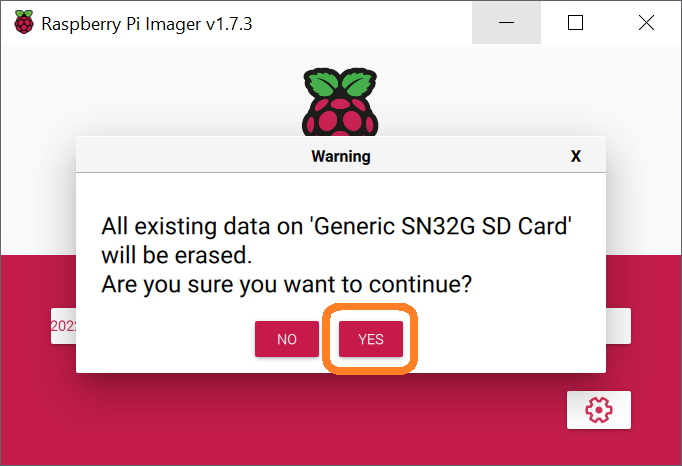
You will get a popup asking you to confirm that all data on the SD card will be erased.
Click "YES" to confirm.
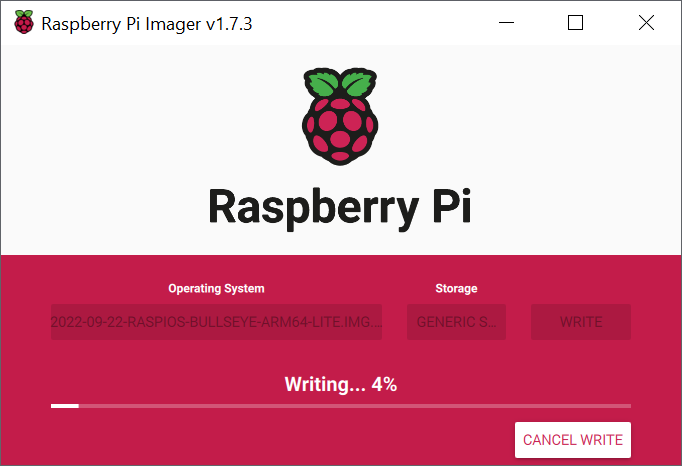
The writing process will start, and the tool will show a progress bar with the percentage done.
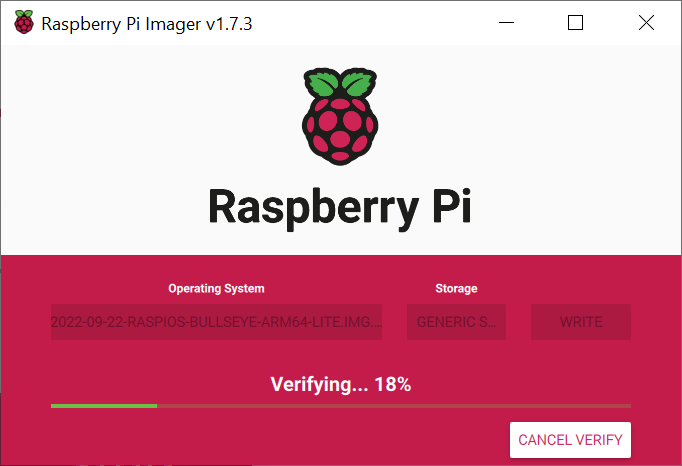
The tool will then verify that the image is good.
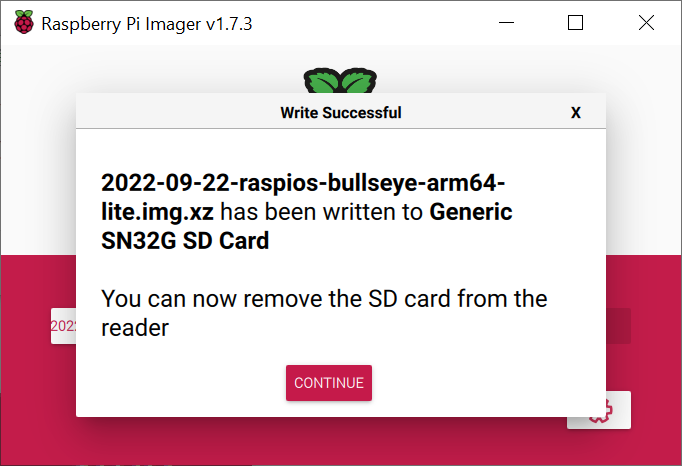
Congratulations! You have just prepared your first Raspberry Pi SD card.
Click "CONTINUE" and close the Raspberry Pi Imager tool.
You may want to go to your OS file explorer and check that the SD card is seen and the boot partition is available.

Now you need to remove the SD card from your computer and insert it into the Raspberry Pi slot.
Connect a network cable from the Raspberry Pi ethernet port to your router or LAN switch.
Power on the Raspberry Pi.
You should be able to see the IP address that your DHCP has released to the Raspberry Pi by inspecting the DHCP leases on your router.
The screen below is taken from my router that is running OpenWrt, but depending on the router model and brand this page might be different.

If you have many leases and you are not sure which one belongs to your Raspberry Pi, you can inspect the first 6 digits of the MAC address and make sure that they match "B8:27:EB" indicating that the manufacturer is the Raspberry Pi Foundation.

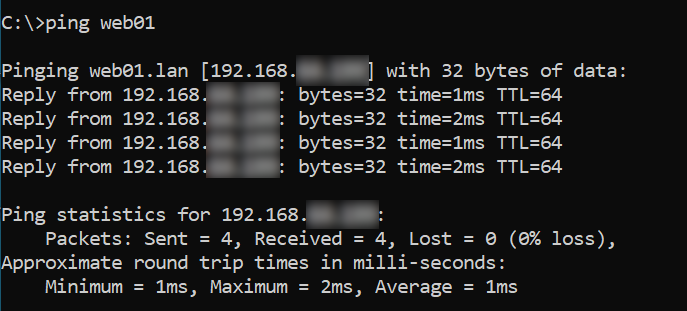
You can also try to ping the Raspberry Pi by its hostname and see if it gets resolved. This works with OpenWrt but it might not work with other routers that have different implementations of DNS/DHCP.
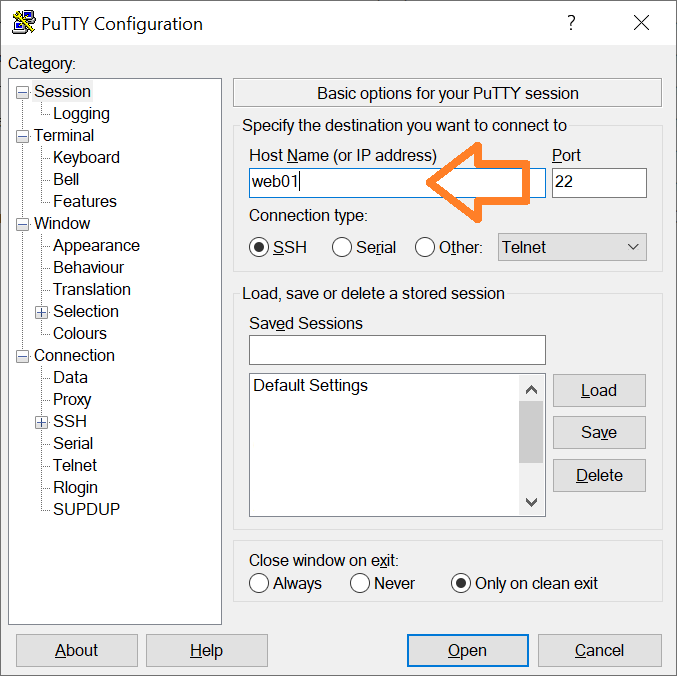
Once you've determined the IP address of the Raspberry Pi, you can start an SSH session with a SSH terminal, such as Putty.
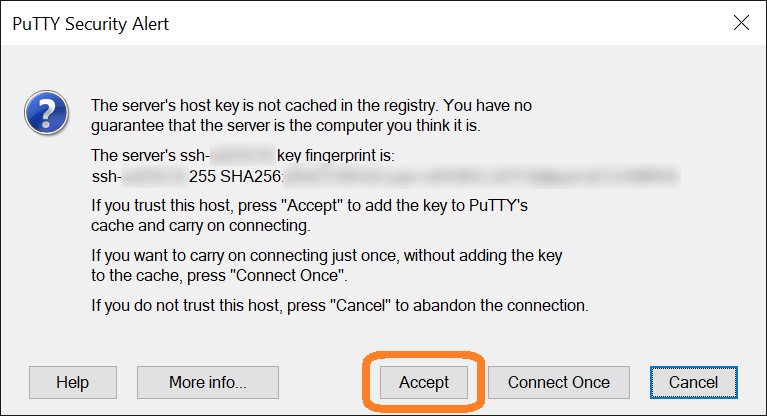
Accept the security warning. It only pops up the first time you connect to the Raspberry Pi.
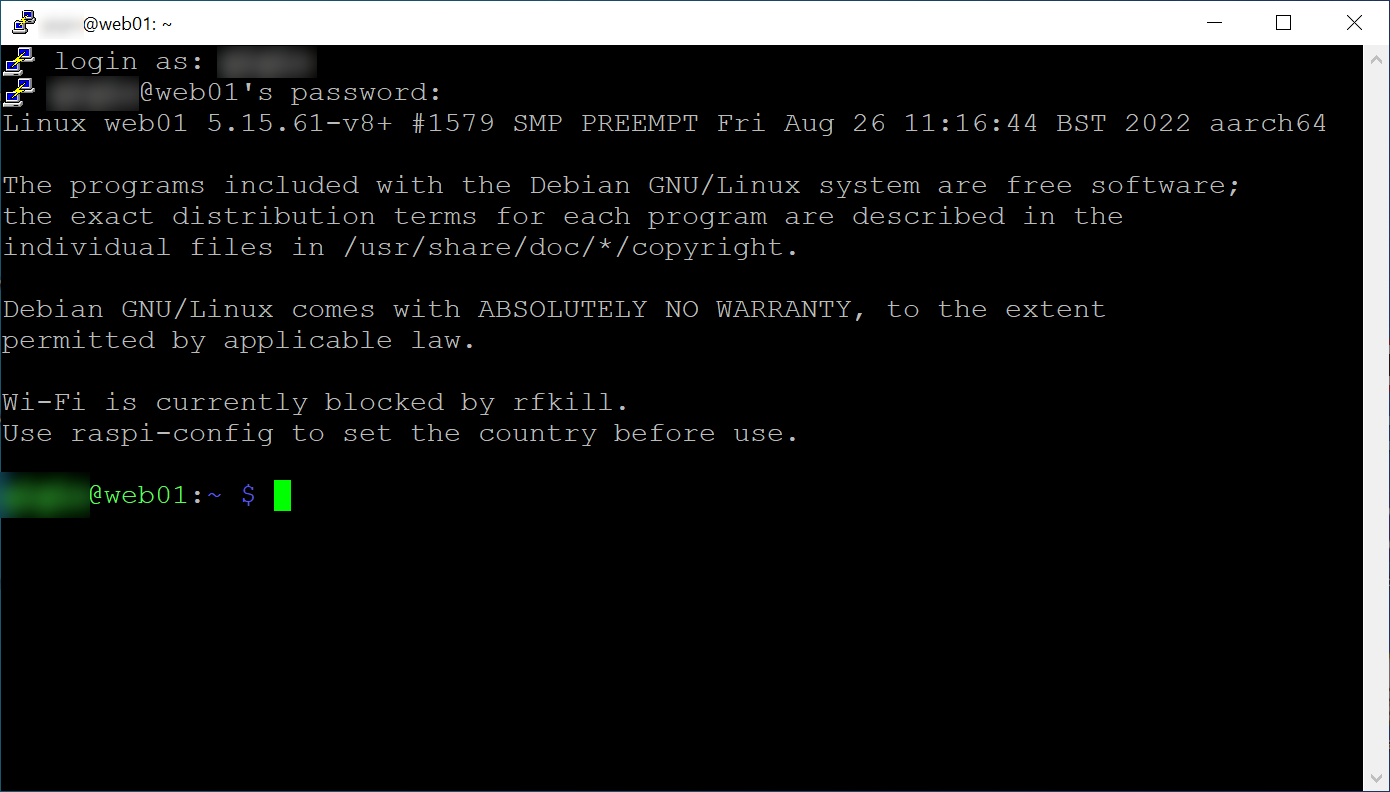
Congratulations again!
You have successfully established your first SSH session to a freshly installed Raspberry Pi.
Disable DHCP
In order to use our Raspberry Pi as a real server, we need to disable DHCP and set a static IP address.
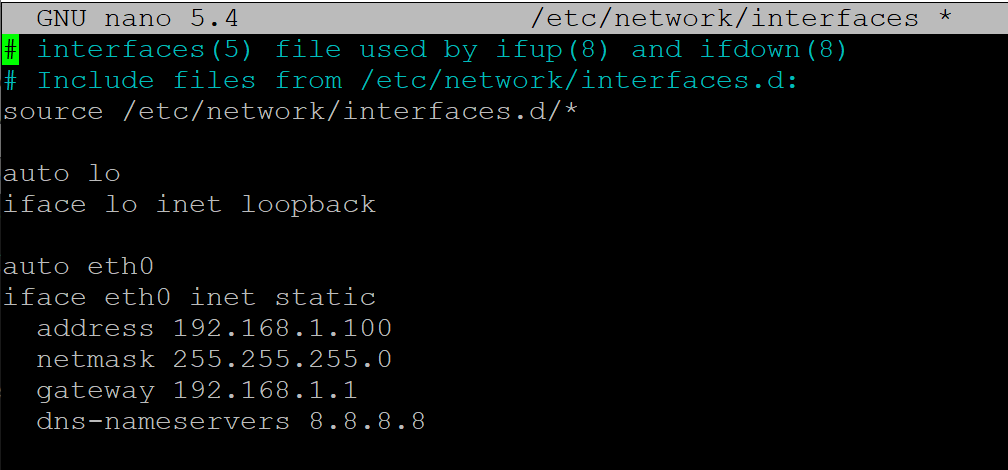
Choose an unused IP address on your local network and make sure you also know the default gateway, the subnet mask, and the DNS.
The default gateway is most probably the IP address of your router, while the subnet mask is commonly 255.255.255.0
but it could be different on your network.
The DNS could be the router IP address if it acts as a DNS proxy (such as OpenWrt) but you may choose to set the Google DNS 8.8.8.8
or another DNS of your choice.
You can specify more than one DNS.
Start by editing the interfaces file:
sudo nano /etc/network/interfaces
This is how the interfaces configuration should look like.
Remember to adjust the IP addresses according to your network settings.
Save the interfaces configuration.
In case you need help with the Nano editor, check out the Nano web site.
Disable the Raspberry Pi DHCP service so that it will not start at boot. Double-check your network configuration before doing that, because in the event of mistakes or IP conflicts, the Raspberry Pi will become unreachable and you will need to rebuild your SD card from scratch.
sudo systemctl disable dhcpcd
Verify that the DHCP is actually disabled
sudo systemctl status dhcpcd

Reboot the Raspberry Pi and check that it is still reachable from the network.
sudo reboot
Disable Wi-Fi and Bluetooth
Wireless connectivity is generally not recommended for use in a server for a few reasons:
-
Security: Wireless networks are generally less secure than wired ones, as it is easier for an attacker to intercept data transmitted over a wireless connection. This is especially important for servers, which may contain sensitive data or be responsible for handling important transactions. This is still valid even for home use.
-
Reliability: Wireless connections can be prone to interference and signal degradation, which can lead to a loss of connectivity or slower speeds. This can be frustrating for users, but it can also be critical for servers that need to be available and responsive at all times.
-
Speed: While wireless networks have improved in terms of speed, they still tend to be slower than wired ones. This can be a problem for servers, which may need to handle large amounts of data or many connections at once.
-
Improved performance: Wireless connections can use up a significant amount of system resources, such as processing power and memory, to maintain the connection and transfer data. By disabling wireless connectivity, these resources can be freed up and used for other tasks.
-
Reduced power consumption: Wireless connectivity requires the use of additional hardware, which can use up power. Disabling wireless connectivity can help to reduce power consumption on a small system such as the Raspberry Pi.
-
Simplified configuration: A wired network is generally easier to set up and manage than a wireless one, especially on a small system. By disabling wireless connectivity, you can simplify the configuration and maintenance of your system.
For these reasons, it is generally recommended to use a wired connection for servers, rather than a wireless one. You can go through the following steps to completely disable Wi-Fi on the Raspberry Pi.
Edit the Raspberry Pi config.txt file using the Nano editor
sudo nano /boot/config.txt
go to the end of file and append the following two overlay statements:
dtoverlay=disable-wifi
dtoverlay=disable-bt
Disable all wireless-related services so that they do not start at boot:
sudo systemctl disable hciuart
sudo systemctl disable bluetooth
sudo systemctl disable wpa_supplicant
Reboot the Raspberry Pi
sudo reboot
When you login with your user you may get the following errors:

To get rid of these errors, issue the following command:
sudo sed -i '2i\ \ \ \ \ \ \ \ exit 0' /etc/profile.d/wifi-check.sh
This will add an exit 0 statement on top of the wifi-check.sh script, preventing it from running.
Configure hosts file
The hosts file is a local file on a computer that maps hostnames to IP addresses. It is used to resolve hostnames to IP addresses, allowing users and services to access network resources by name rather than by IP address.
Configuring the hosts file as a fallback in case DNS becomes unavailable can help ensure that a computer can still access network resources, even if the primary DNS server is unavailable. This can be especially useful in situations where the computer needs to access critical resources, such as in a fault-tolerant system made up of two or more nodes.
Here's how it works: When a computer needs to access a network resource, it first checks the hosts file to see if the hostname is listed there. If the hostname is found, the computer uses the corresponding IP address to access the resource. If the hostname is not found, the computer sends a request to the DNS server to resolve the hostname to an IP address.
By configuring the hosts file as a fallback, you can ensure that the computer can still access the network resource even if the DNS server is unavailable. This can be useful in cases where the DNS server is down or experiencing problems, or if the computer is unable to reach the DNS server due to network issues.
It's worth noting that while the hosts file can be useful as a fallback in case of DNS issues, it is not a replacement for DNS. The hosts file is a local file that is specific to each computer, and it does not provide the same level of scalability or flexibility as a centralized DNS server.
Here is how my mini web server hosts file looks like:
127.0.0.1       localhost
::1             localhost ip6-localhost ip6-loopback
ff02::1         ip6-allnodes
ff02::2         ip6-allrouters

127.0.1.1       web01
192.168.1.100   web01.lan
In this particular case, the last line is the one that provides name resolution for the web server host name. You can add as many lines as you want, including all nodes that you want to be reachable by name, in case your network DNS becomes unavailable.
The hosts file requires relatively little maintenance, but it is important to keep it up-to-date and accurate in order to ensure that the computer can access the network resources it needs.


